Understanding Vapor Barrier Installation
What is a Vapor Barrier?
A vapor barrier is a crucial component in the construction of buildings, particularly in areas such as basements and crawl spaces, where moisture control is paramount. It is typically a sheet of plastic or foil that prevents moisture from passing from the ground or outside air into a structure. By blocking water vapor, a vapor barrier helps maintain indoor air quality, prevents mold growth, and protects structural elements from wood rot and other moisture-related damage. Understanding its properties and functions is essential for any homeowner or builder seeking to safeguard their property.
Why is Vapor Barrier Installation Important?
The installation of a vapor barrier plays a critical role in moisture management within a building. Without it, excess humidity can lead to a myriad of issues, including the growth of mold and mildew, which can compromise indoor air quality and pose health risks. Additionally, moisture can weaken structural components, impacting the longevity of the building. Proper Vapor Barrier Installation ensures that these risks are mitigated, ultimately saving homeowners from costly repairs and promoting a healthier living environment.
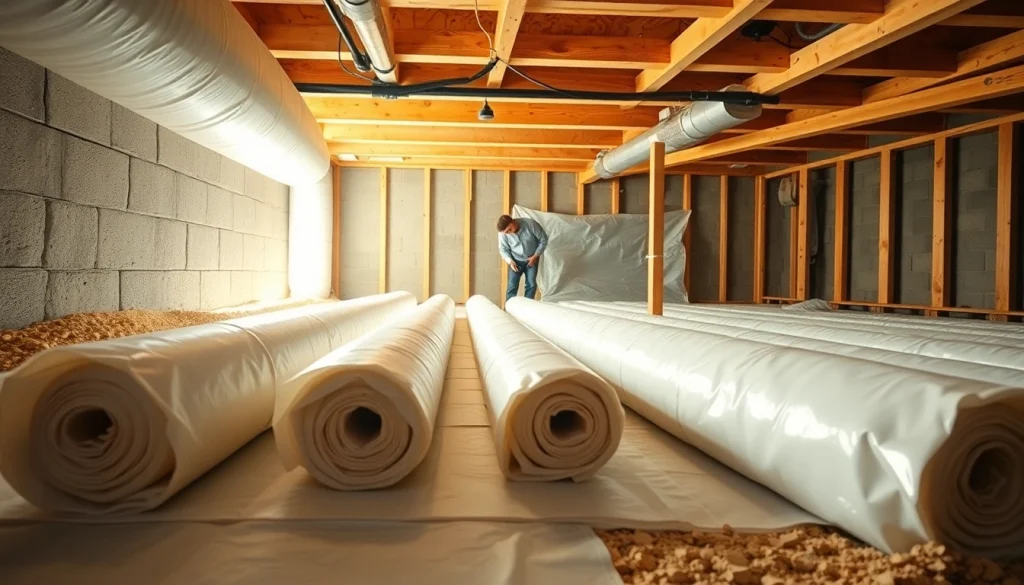
Common Materials Used for Vapor Barriers
Various materials are employed in the construction of vapor barriers, depending on the specific needs of the structure and environmental conditions. Common options include:
- Polyethylene Sheets: Often the most used material, these sheets come in different thicknesses and are effective at blocking moisture.
- Foil: Reflective foil barriers are excellent for preventing radiant heat gain and control moisture.
- Spray-on Vapor Barriers: These liquid-applied membranes create an enduring barrier once cured, suitable for irregular surfaces.
- Self-Adhesive Membranes: These offer easy application and effective moisture protection in difficult areas.
Preparing for Vapor Barrier Installation
Assessing Crawl Space Condition
Before installing a vapor barrier, it’s essential to assess the condition of the crawl space. Look for signs of moisture accumulation, such as puddles or damp soil, and inspect for mold growth. Ensure the area is free of debris and any pests. Additionally, note whether drainage systems, like sump pumps or gutters, are functioning correctly, as these play a significant role in moisture management.
Tools and Materials Required
A successful installation requires appropriate tools and materials. Essential items include:
- Vapor barrier material (polyethylene sheets or foil)
- Utility knife or scissors for cutting material
- Tape measure for precise measurements
- Construction adhesive or tape for sealing
- Safety goggles and gloves for personal protection
Safety Precautions During Installation
Safety is paramount during any installation project. Ensure proper ventilation in the crawl space to avoid inhalation of fumes or dust. Wear safety goggles and gloves to protect against sharp objects. Additionally, be cautious of any electrical wiring or plumbing that may be present, and avoid working alone in confined spaces.
The Step-by-Step Process of Vapor Barrier Installation
Pre-Installation Tasks to Consider
Prior to installing the barrier, ensure the ground is dry and adequately prepared. Clear away any rocks, debris, or old materials that could puncture the barrier. If necessary, add gravel or sand to level out the surface. This preparation is vital for ensuring a durable installation.
Installing the Vapor Barrier Correctly
Follow these steps for effective installation:
- Roll out the vapor barrier across the crawl space floor.
- Ensure the barrier overlaps at seams; this prevents moisture from penetrating through gaps.
- Use construction tape or adhesive to secure seams, making sure it’s airtight.
- Extend the barrier up the walls of the crawl space, ideally to a height of 12 inches.
- Secure the barrier to walls using adhesive or tape, ensuring no gaps remain.
Sealing and Finishing Touches
After laying out the vapor barrier, it’s crucial to seal all edges and seams meticulously. Use heavy-duty tape to secure the overlaps, and make sure all penetrations, like plumbing or electrical fixtures, are adequately sealed. This final sealing process helps to ensure that the barrier performs its function effectively over time.
Maintenance After Vapor Barrier Installation
Monitoring and Repairing the Vapor Barrier
Once installed, regularly inspect the vapor barrier for signs of damage or wear. Look for tears, punctures, or areas where the barrier has sagged. If any issues are identified, they should be repaired immediately by cleaning the area and sealing with appropriate tape or adhesives.
Seasonal Maintenance Tips
Seasonal changes can impact moisture levels, so conduct checks at least twice a year. After heavy rains or snow melts, verify that moisture isn’t collecting in the crawl space. Additionally, ensure that gutters and downspouts are directing water away from the foundation, further reducing moisture risks.
Signs of Vapor Barrier Failure to Watch For
Be vigilant for signs indicating that your vapor barrier might be failing. These include:
- Increased humidity levels in the crawl space or home
- Mold or mildew growth on visible surfaces
- Unpleasant odors in enclosed areas
- Pools of water or damp spots on the barrier itself
FAQs on Vapor Barrier Installation
How often should I replace my vapor barrier?
A vapor barrier should be checked regularly and replaced every 5-10 years, especially if signs of deterioration, moisture, or mold appear.
Can I install a vapor barrier myself?
Yes, with the right tools and preparation, a homeowner can install a vapor barrier. It’s important to follow the instructions carefully for best results.
What are the costs associated with vapor barrier installation?
Costs vary based on materials and labor. Typically, homeowners may expect to spend between $1 and $3 per square foot for installation.
Is a vapor barrier necessary in all climates?
While it’s particularly important in humid climates, a vapor barrier can benefit homes in drier areas as well, especially in basements and crawl spaces.
What issues can arise without vapor barrier installation?
Without a vapor barrier, homes may experience increased humidity, leading to mold growth, structural damage, poor air quality, and higher energy costs due to inefficient heating and cooling.